Ready to build your first robot? Pedro makes
it fun and easy to dive into robotics, electronics, and programming no
tools required. Designed with education in mind, Pedro offers an ideal
STEM experience through hands-on learning and modular technology.
Pedro's body is fully 3D-printable. All STL files are available under
open-source license and can be printed using any standard desktop 3D
printer. Parts are designed to require no supports and minimal
post-processing.
Recommended settings:
✅ Material: PLA or ABS
✅ Layer height: 0.2 mm
Download STL files
✅ Infill: 30%
✅ Support: Touching Buildplate
✅ Infill: 30%
✅ Support: Touching Buildplate
✅ Infill: 50%
✅ Support: Everywhere
✅ Infill: 50%
✅ No supports required
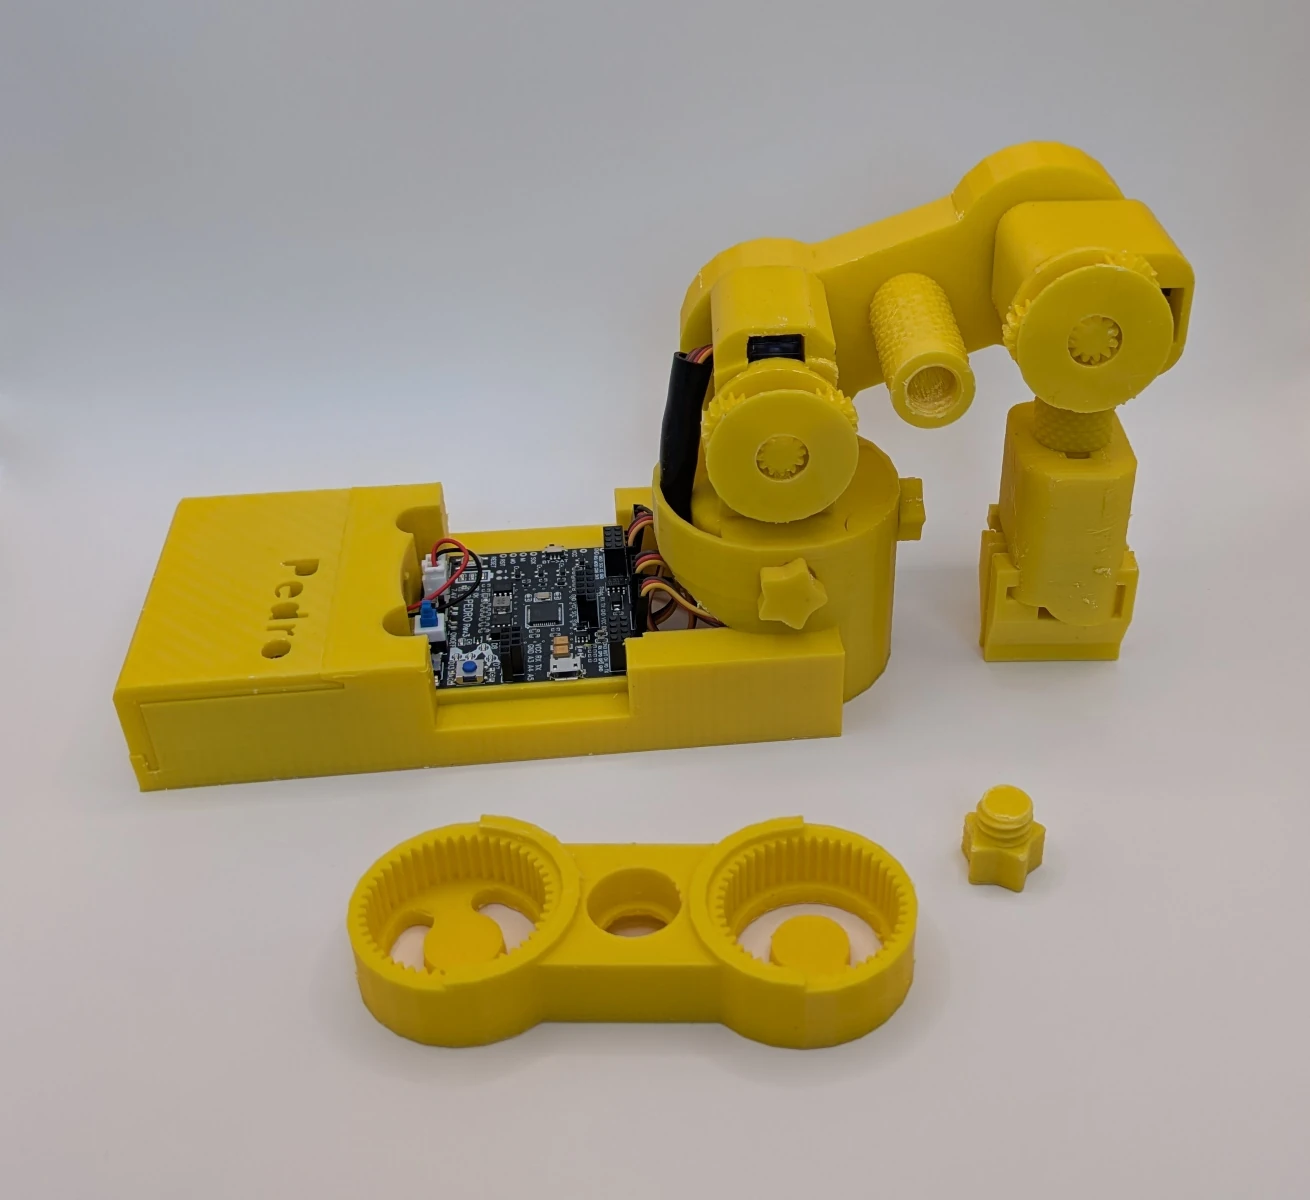
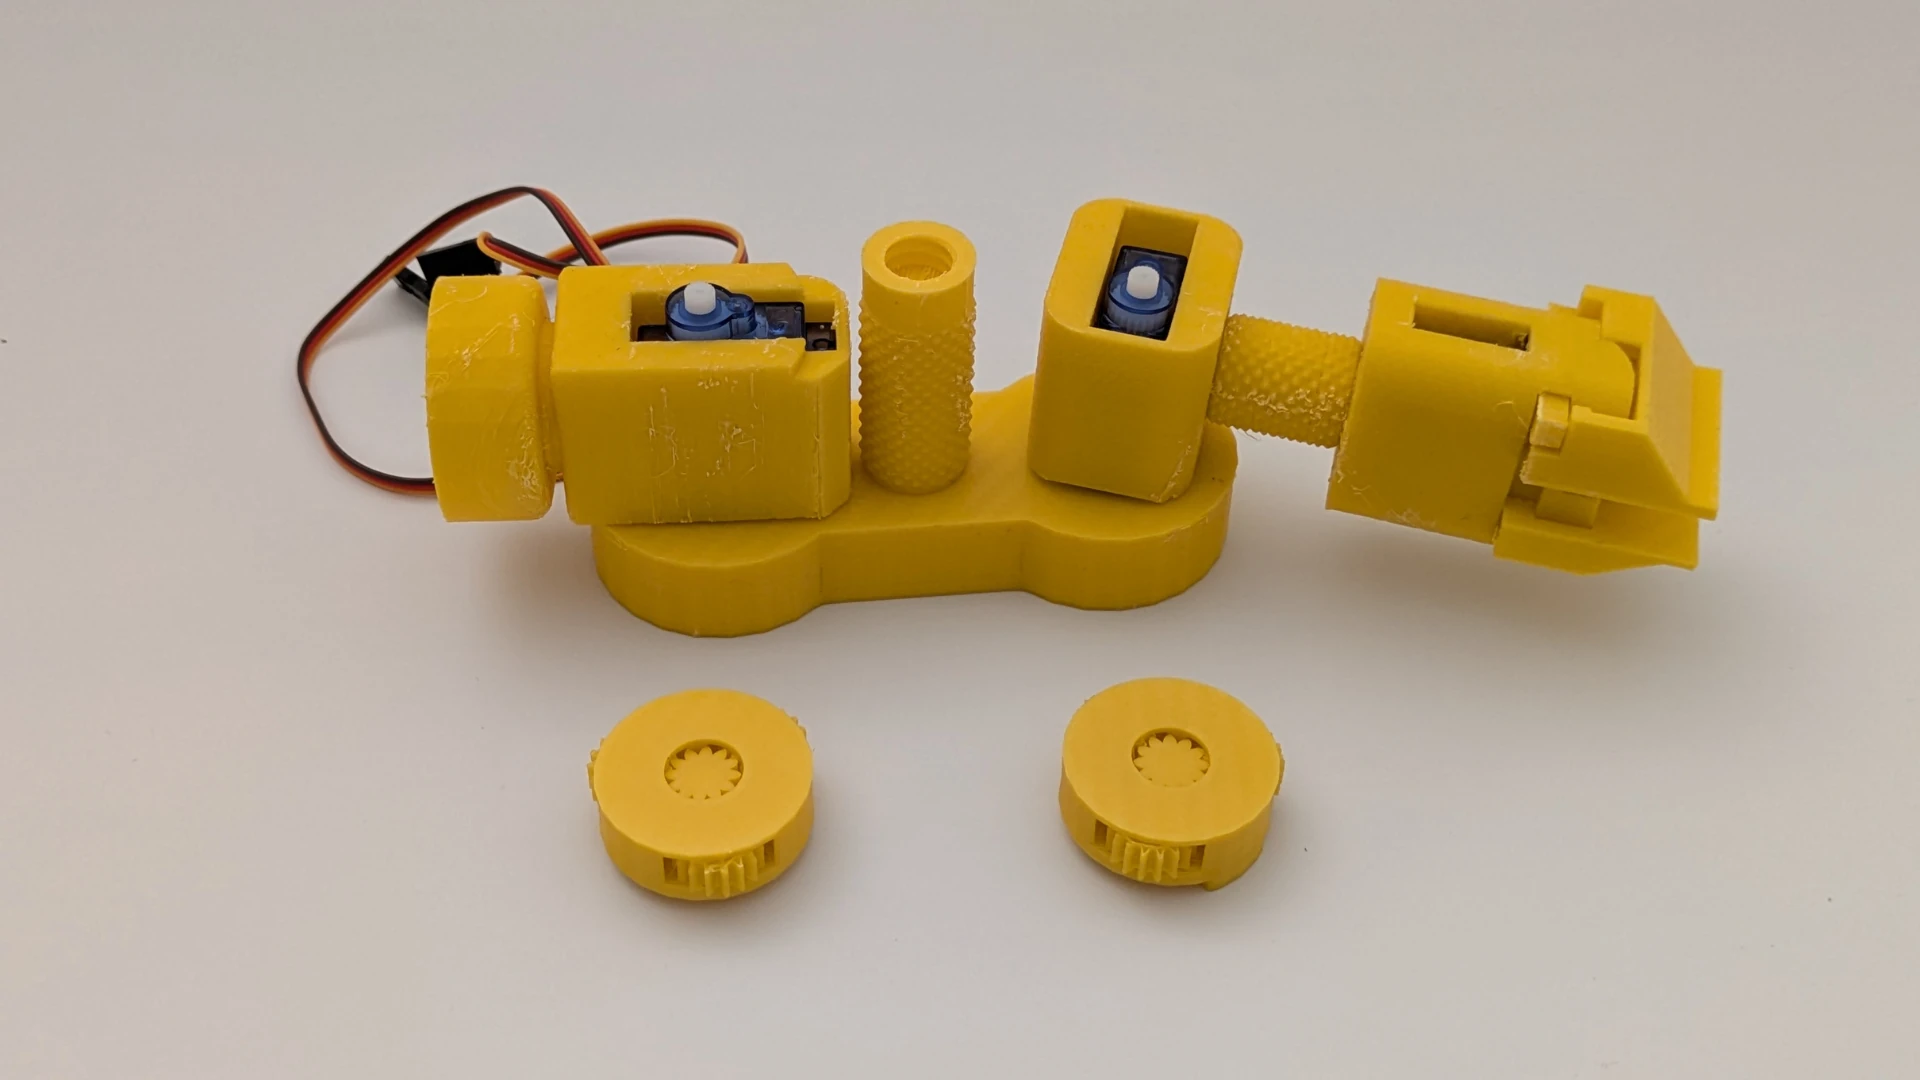
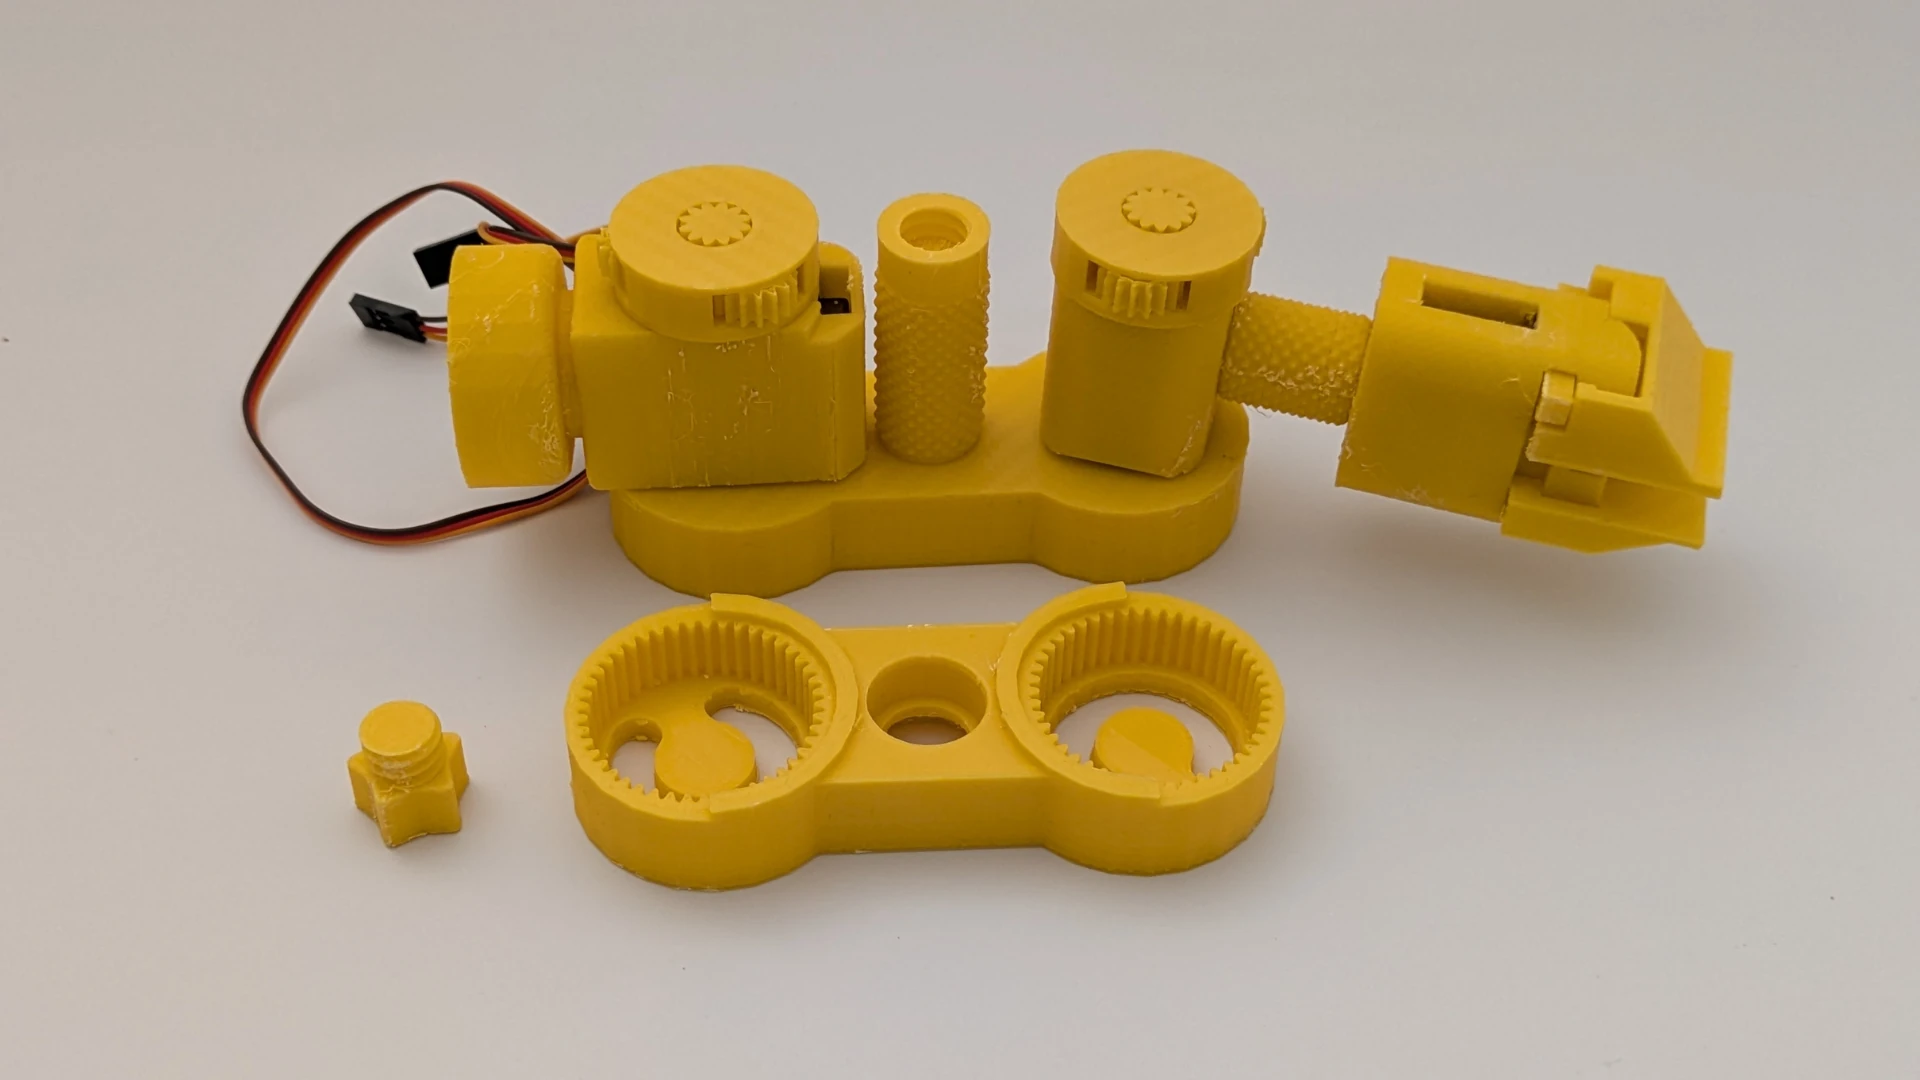
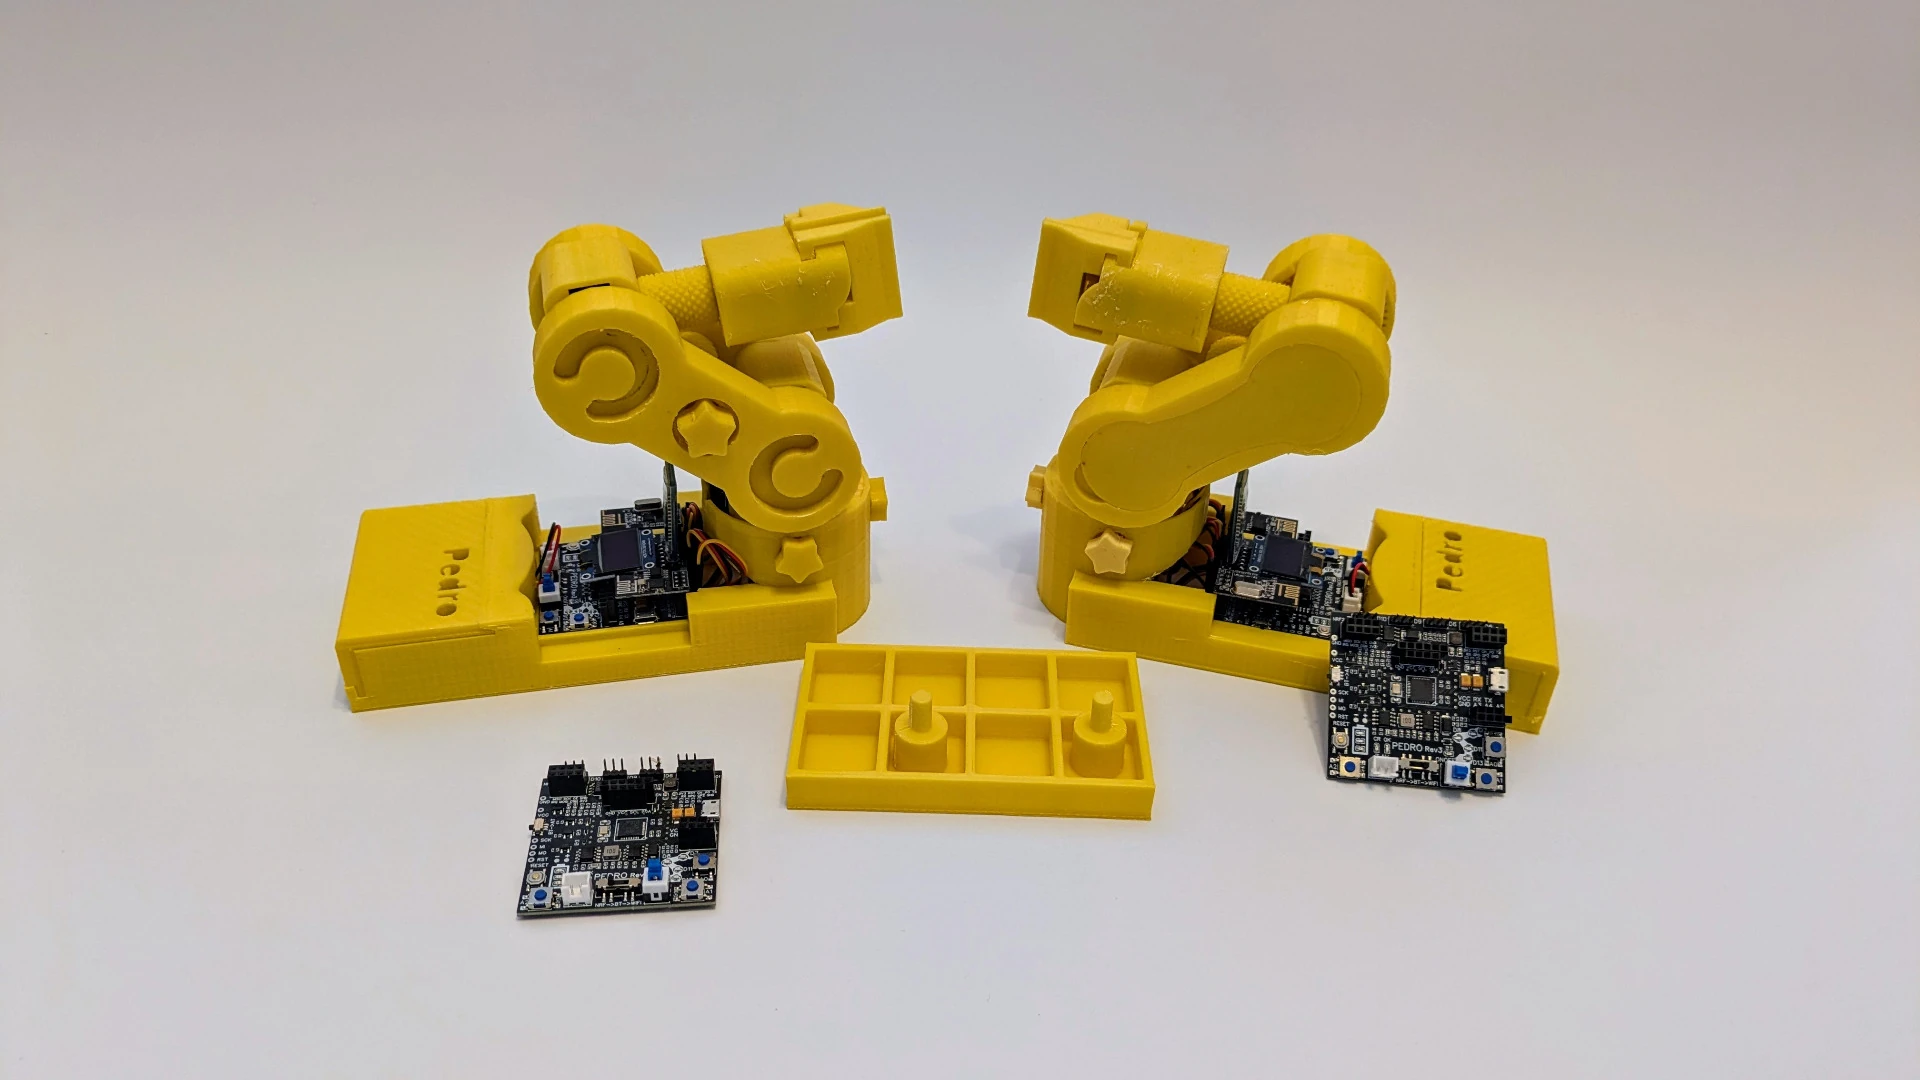
Pedro uses a compact and efficient planetary
gear system that enhances torque and precision. This custom-designed
mechanism allows for smoother motion, ideal for educational demos and
real-world robotics exercises.
Students can learn about mechanical engineering principles while assembling and observing gear behavior.
How does Pedro move using planetary gear systems?
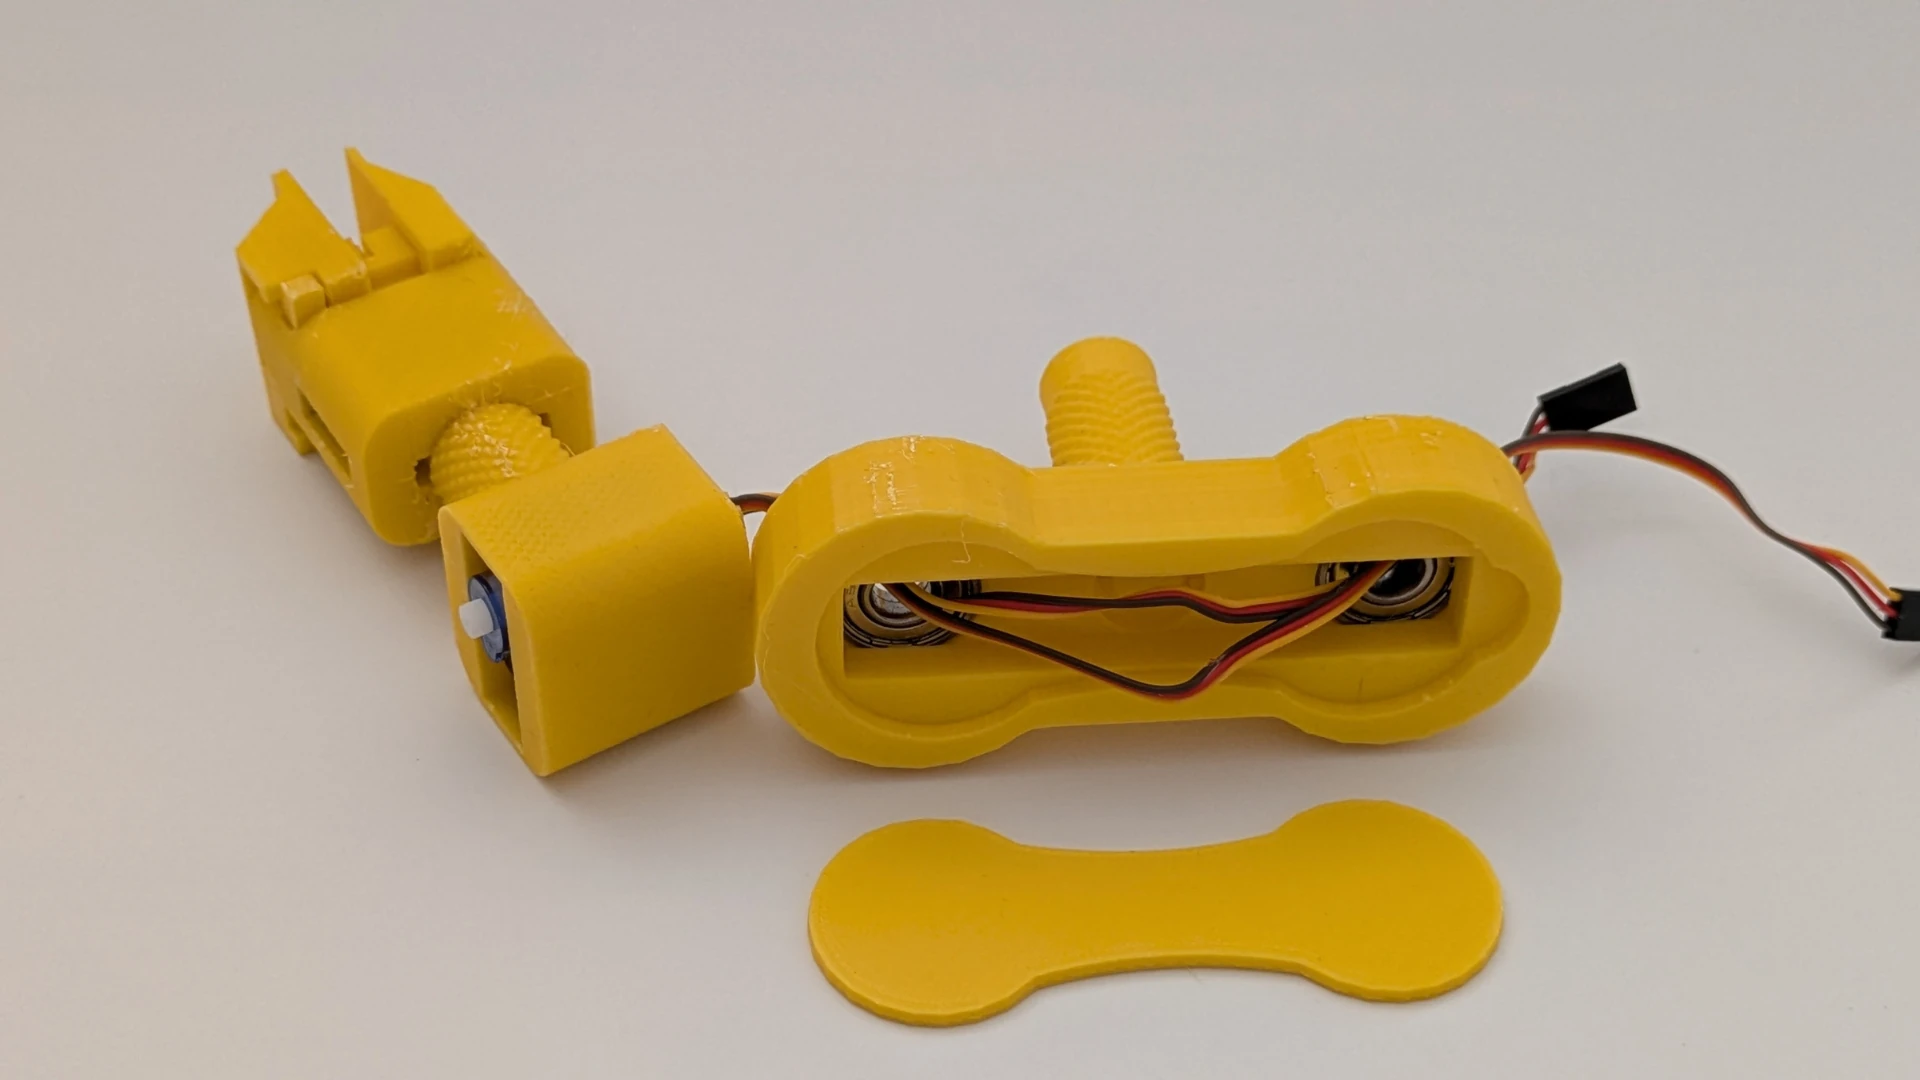
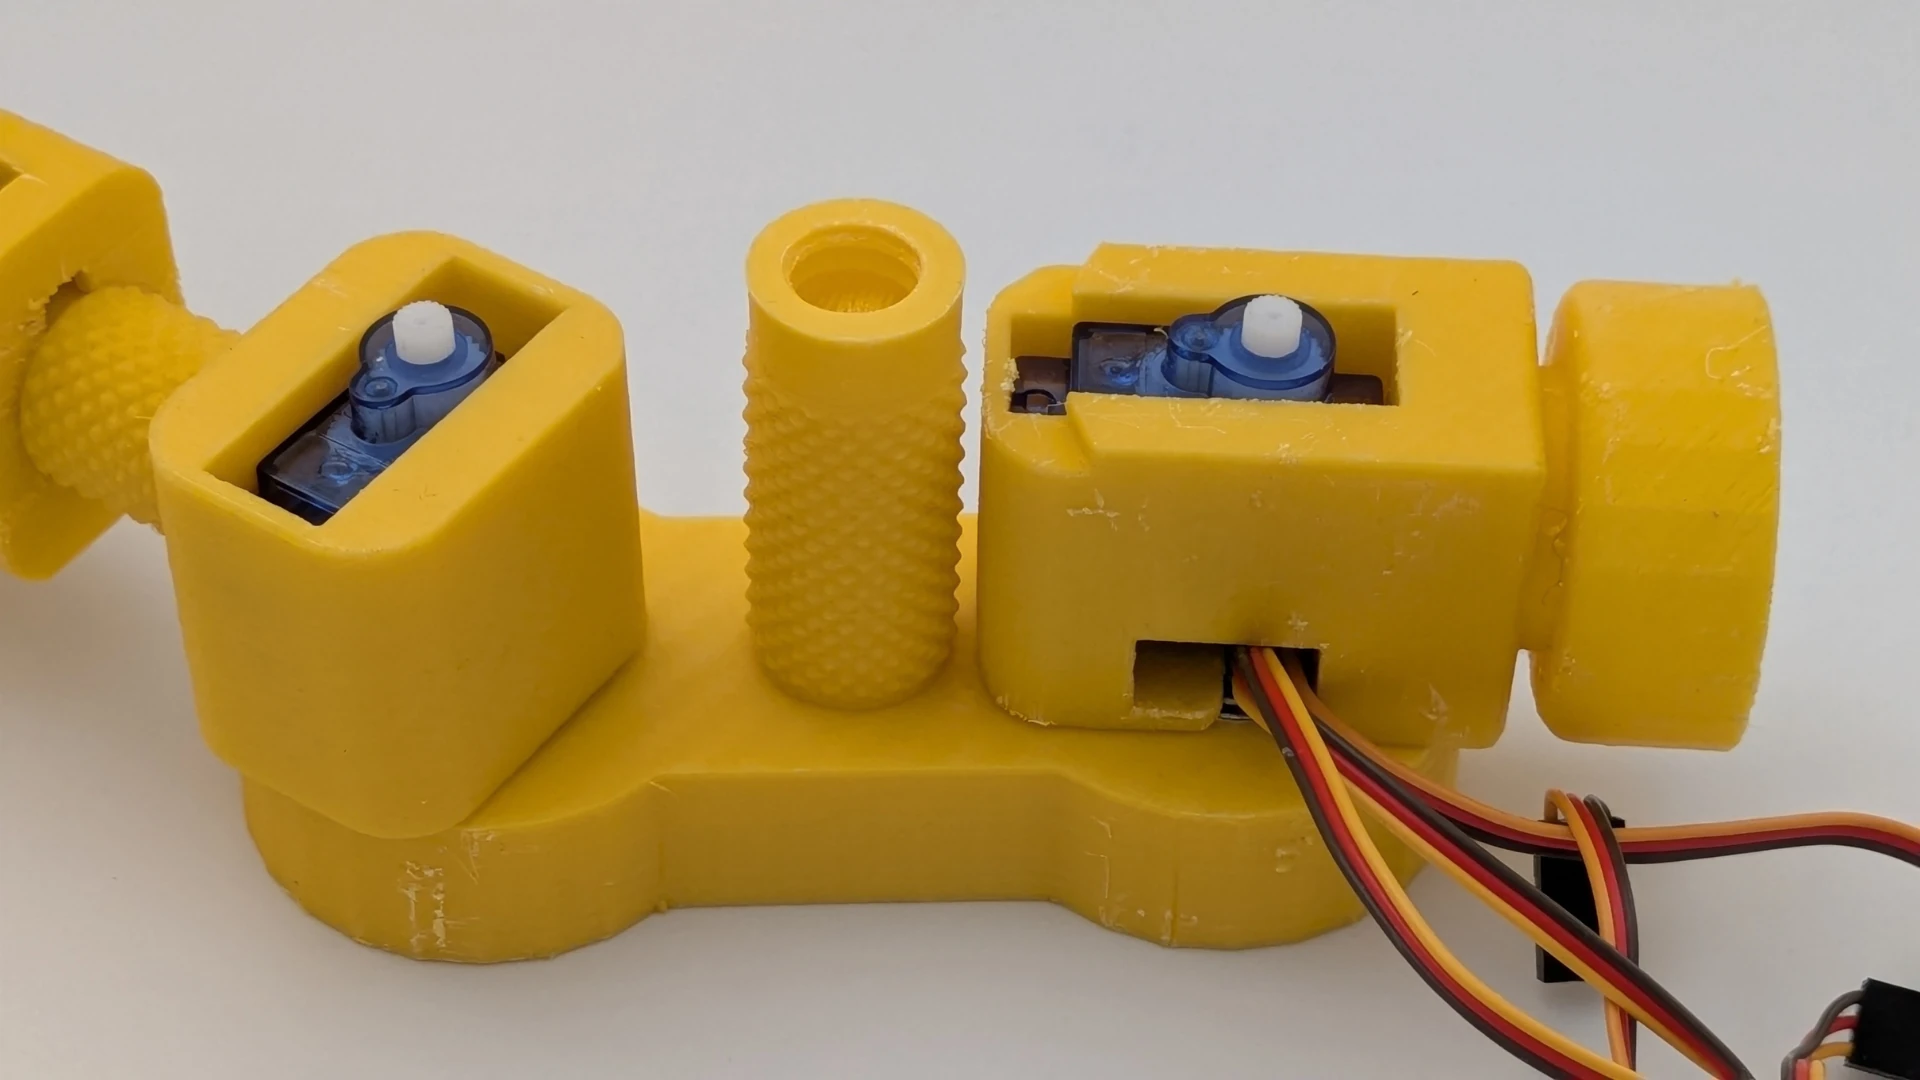
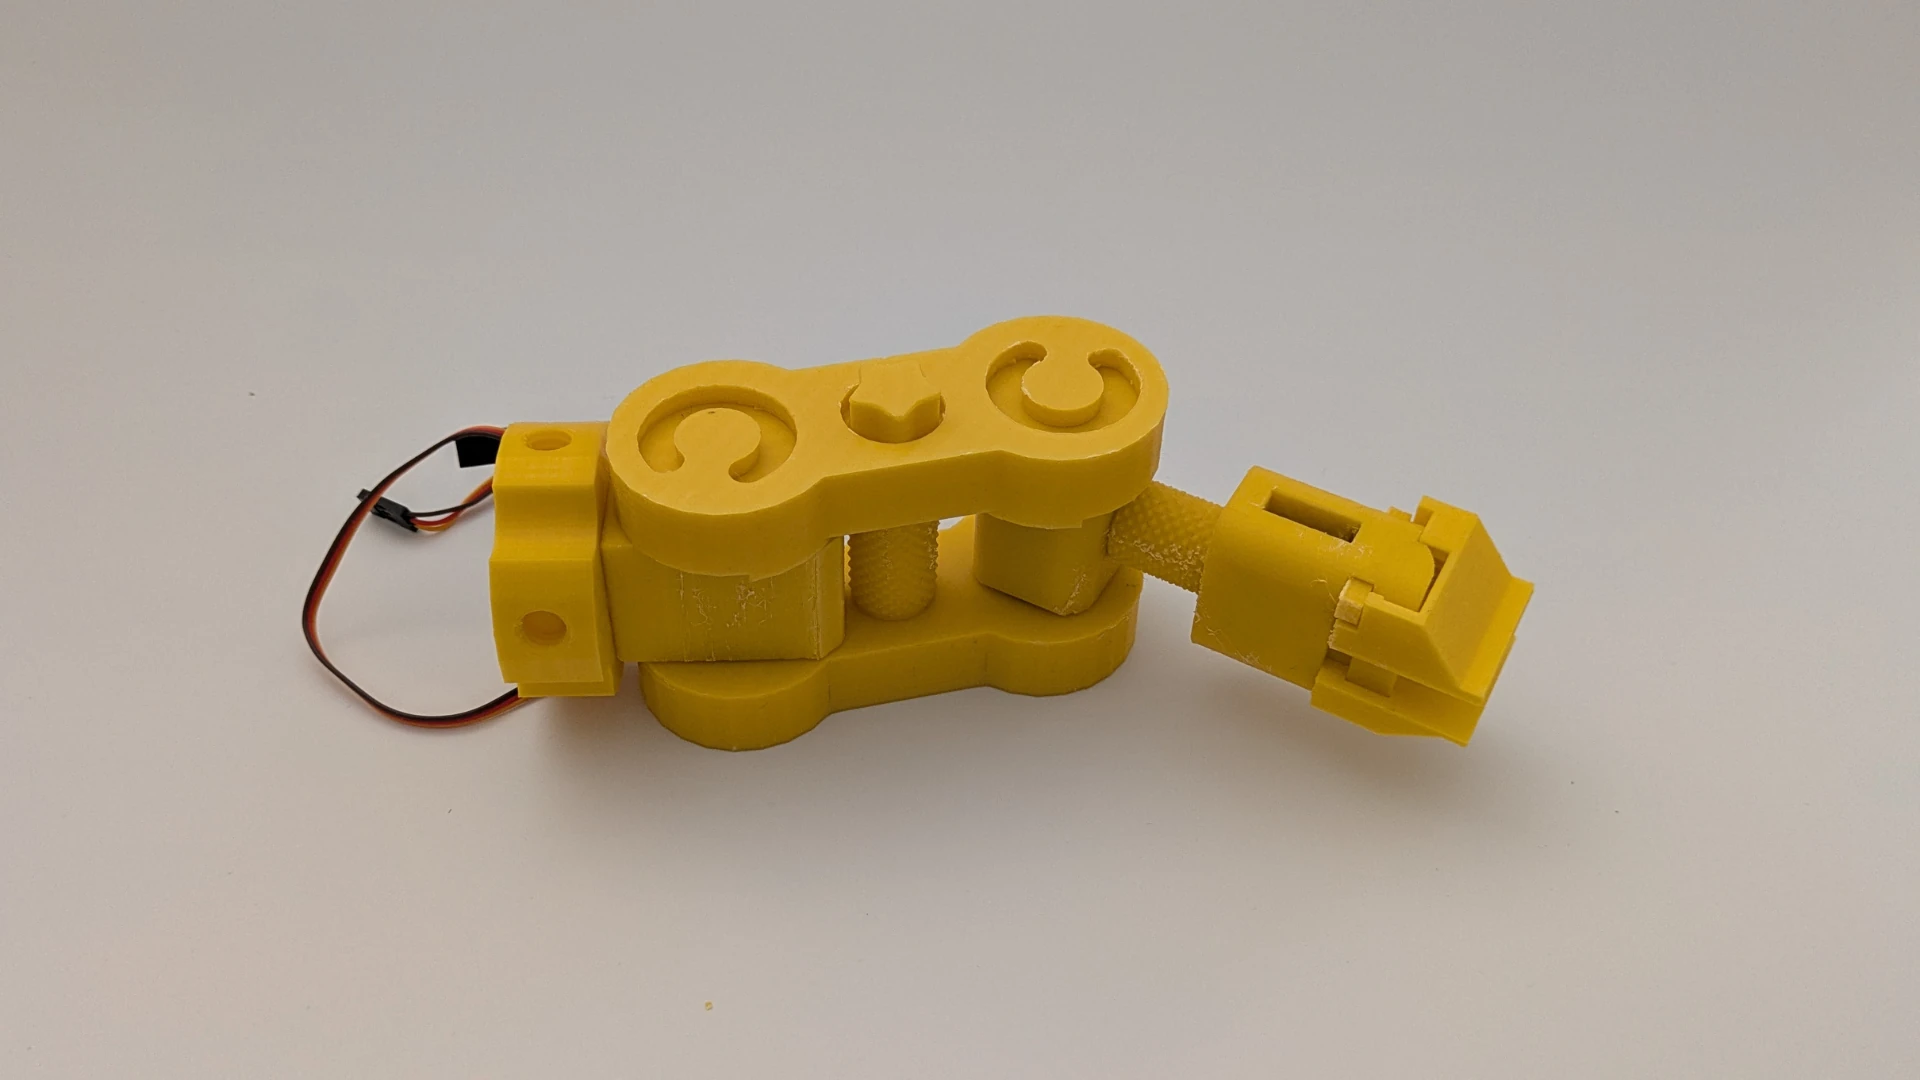
Pedro features three planetary
motion modules, fully 3D-printed. These modules enable smooth and
precise movements, powered by continuous rotation servo motors placed at
the center of each joint.
What is a planetary gear system in robotics?
A planetary gearbox is a gear
mechanism that optimizes motion transmission by reducing speed and
increasing torque. It consists of:
☀️ The sun gear: the central gear (driven by the motor)
🌍 The planet gears: three gears rotating around the sun
⚙️ The ring gear (here replaced by Pedro’s structure), holding everything together
Why use a planetary system on Pedro?
✅ Increased power and precision
✅ Compact and robust design
✅ Fully 3D-printable with no complex parts
This system allows Pedro to execute smooth and precise movements in its three main joints: the base, shoulder, and elbow.
No screws, no glue—just 100% Open-Source & DIY! 🚀
No screws, no tools, no hassle.
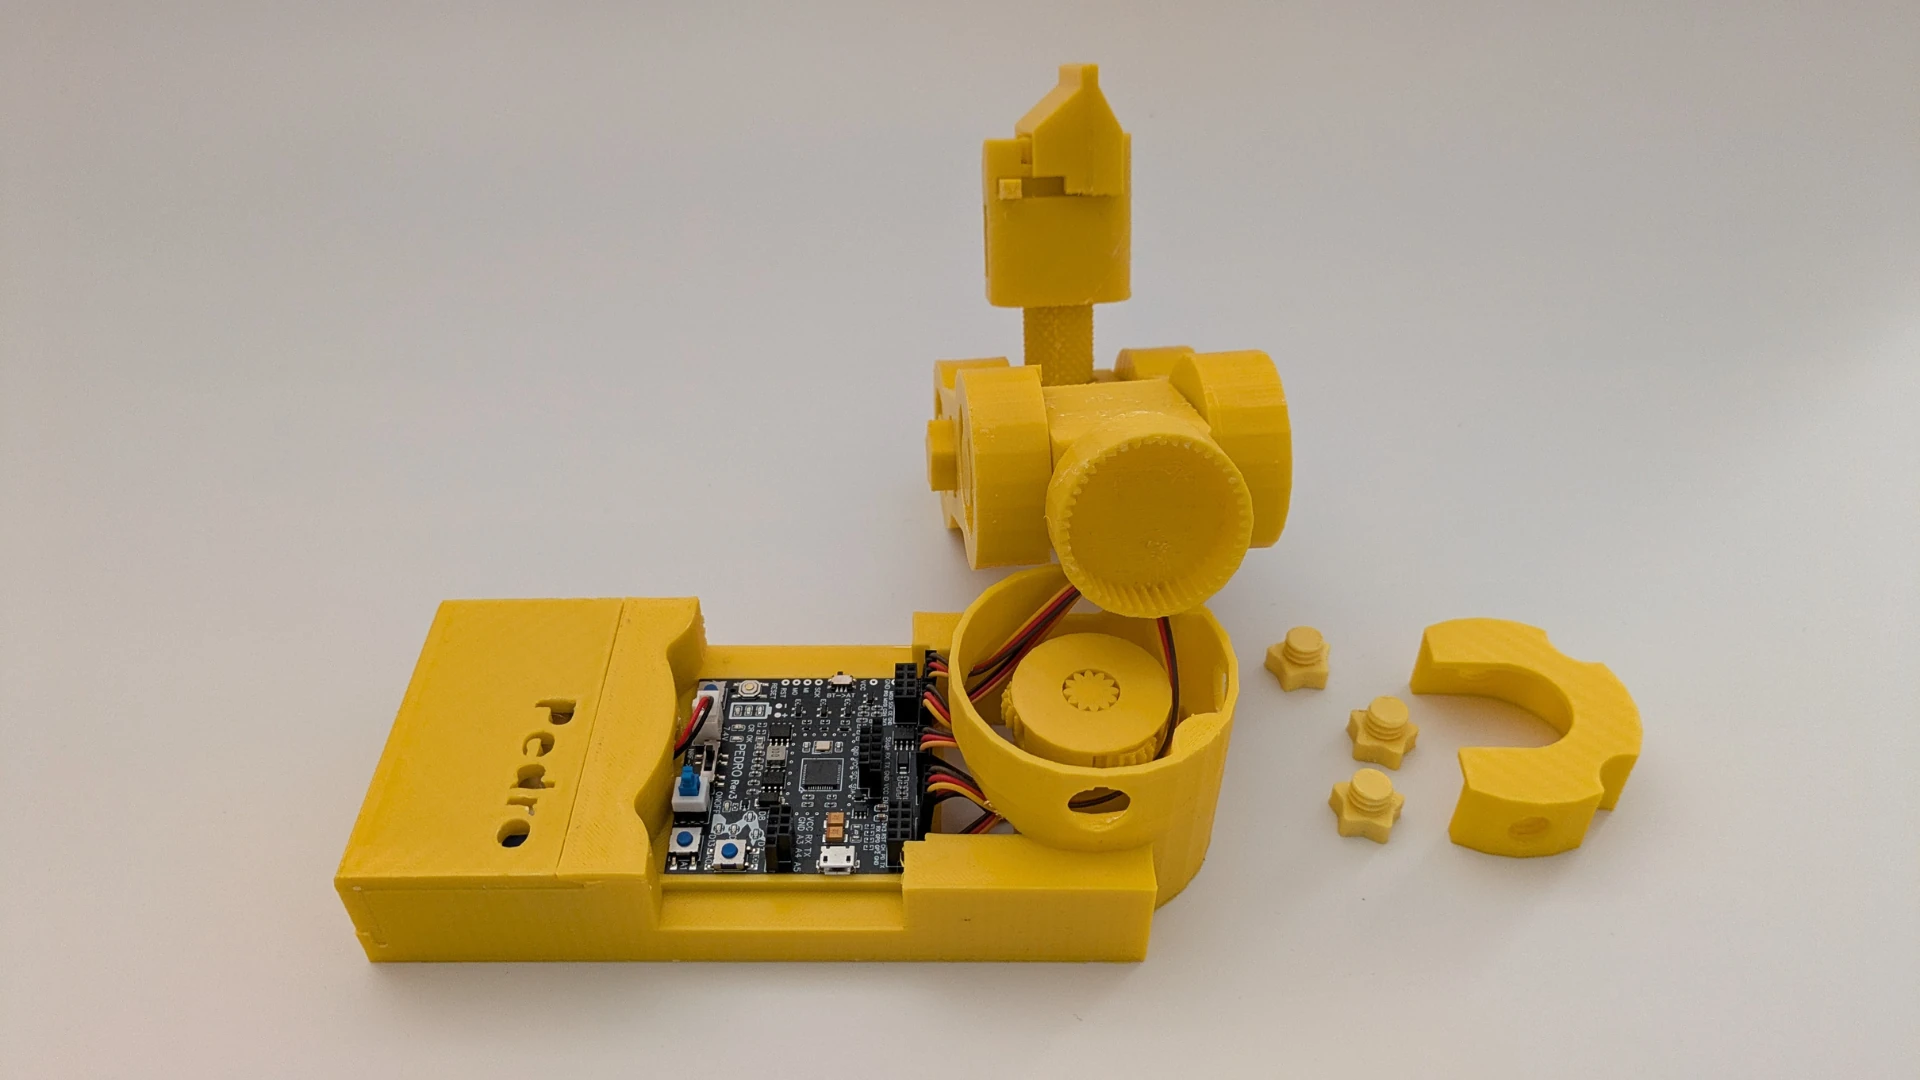
Pedro has been engineered with a plug-and-play
assembly system. The printed parts snap and lock together intuitively,
making it ideal for beginners and classrooms.
Each servo motor, sensor, and board has a dedicated, labeled slot—ensuring quick and correct installation.
Estimated build time: ~30 minutes
No tools needed. A hands-on experience for all levels. Fast build time in 10 minutes.
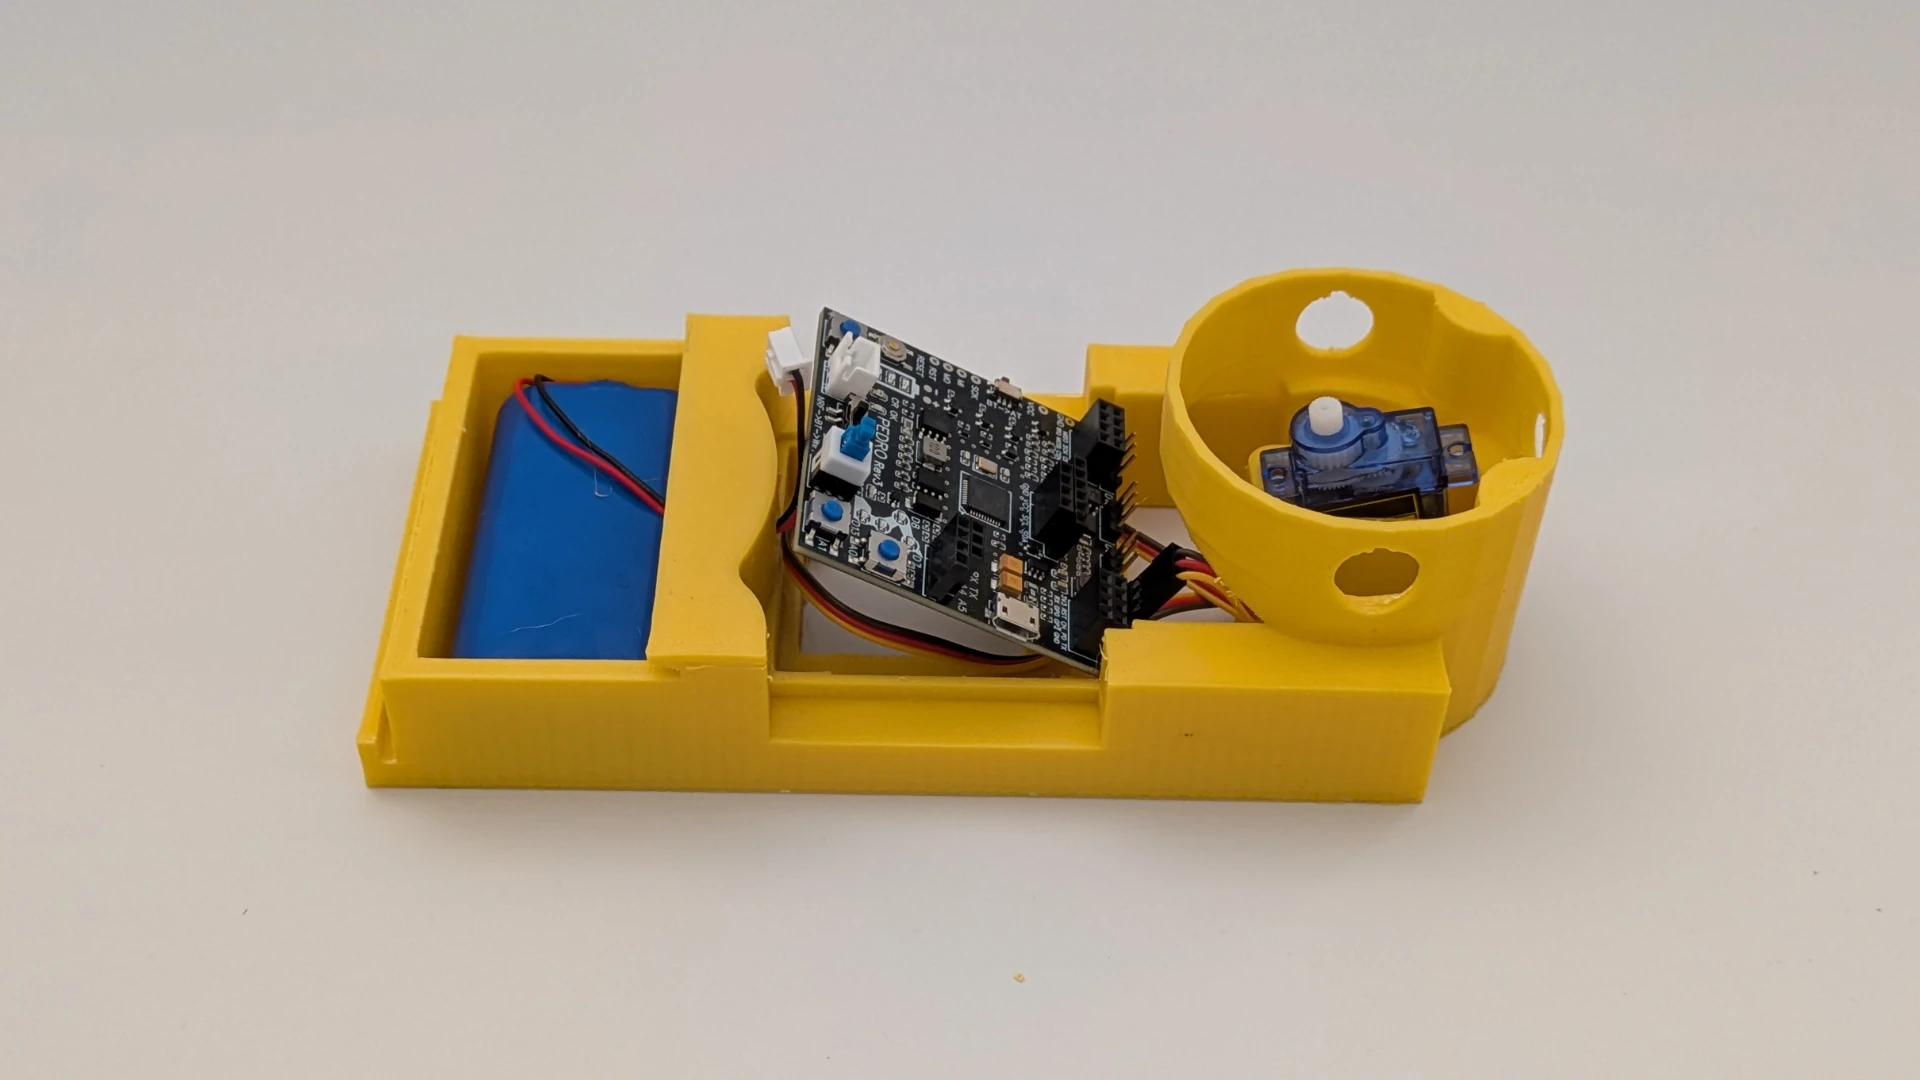
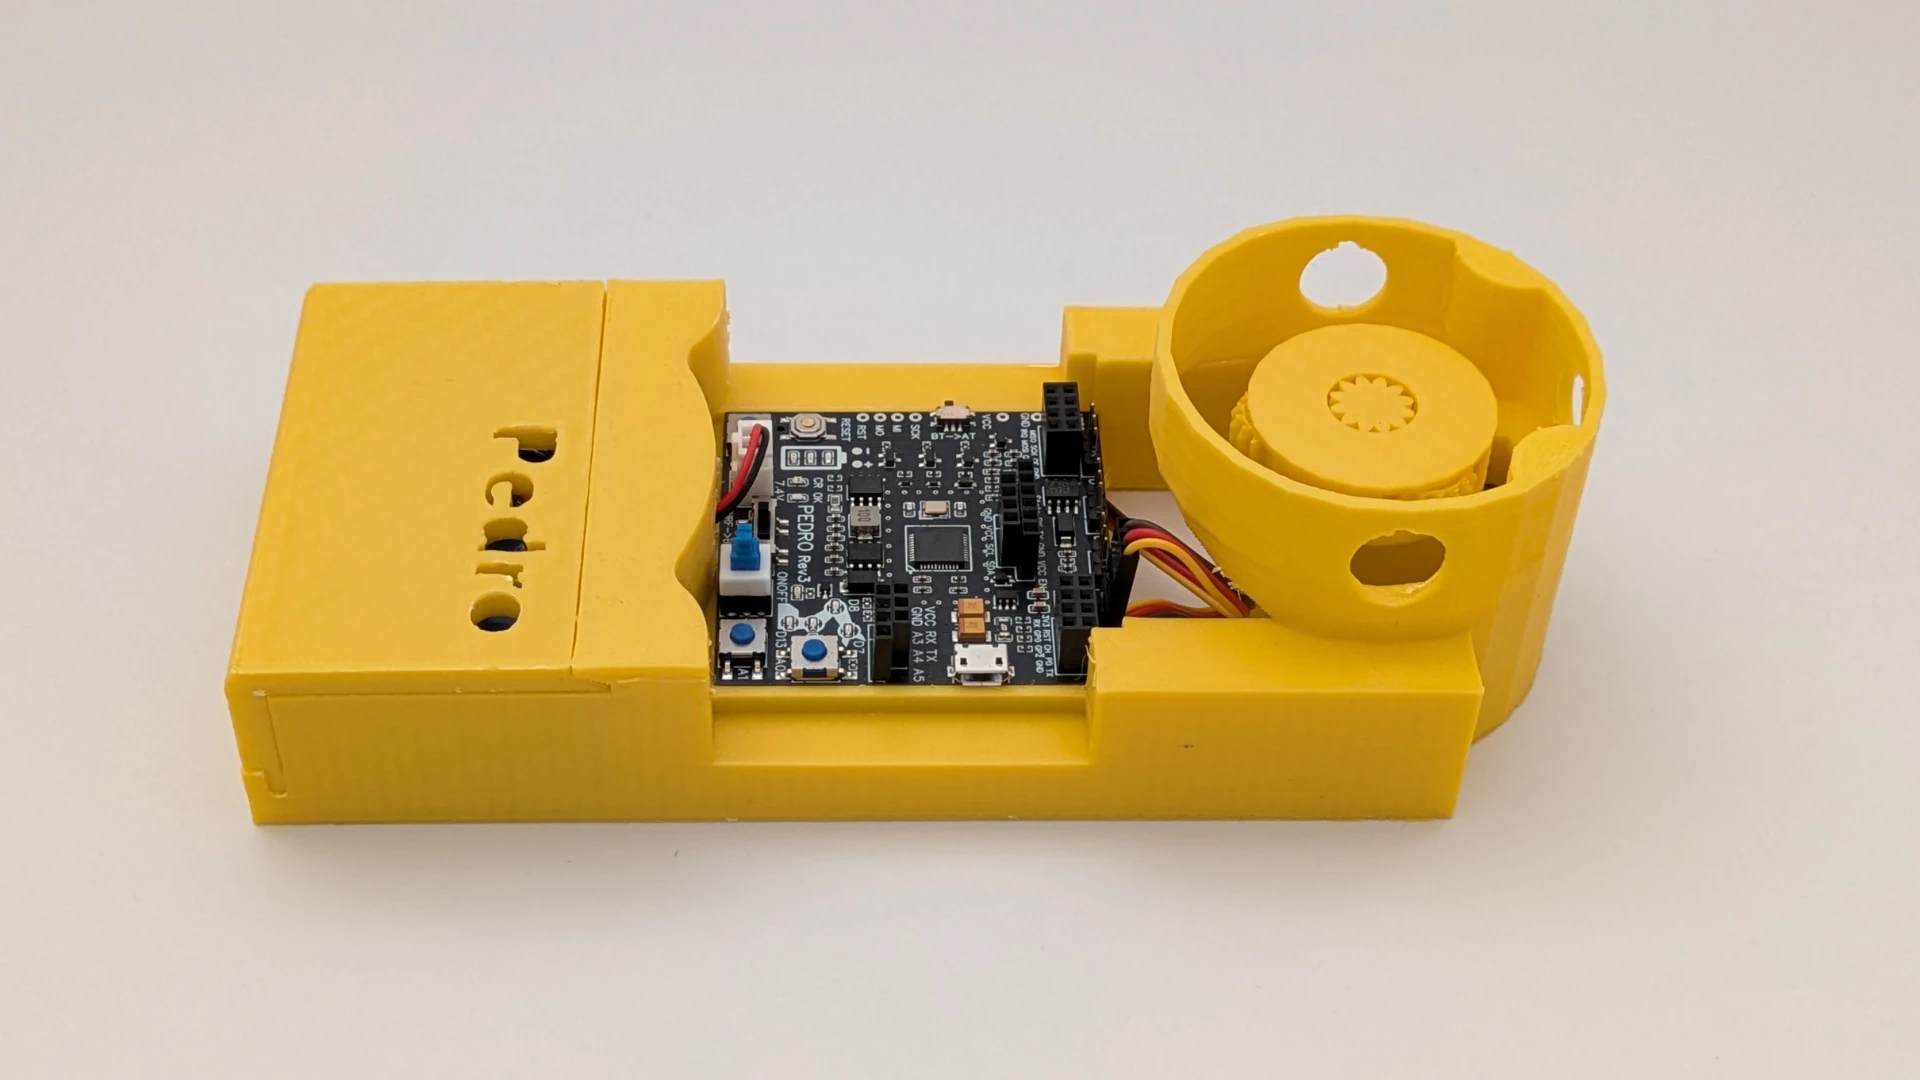
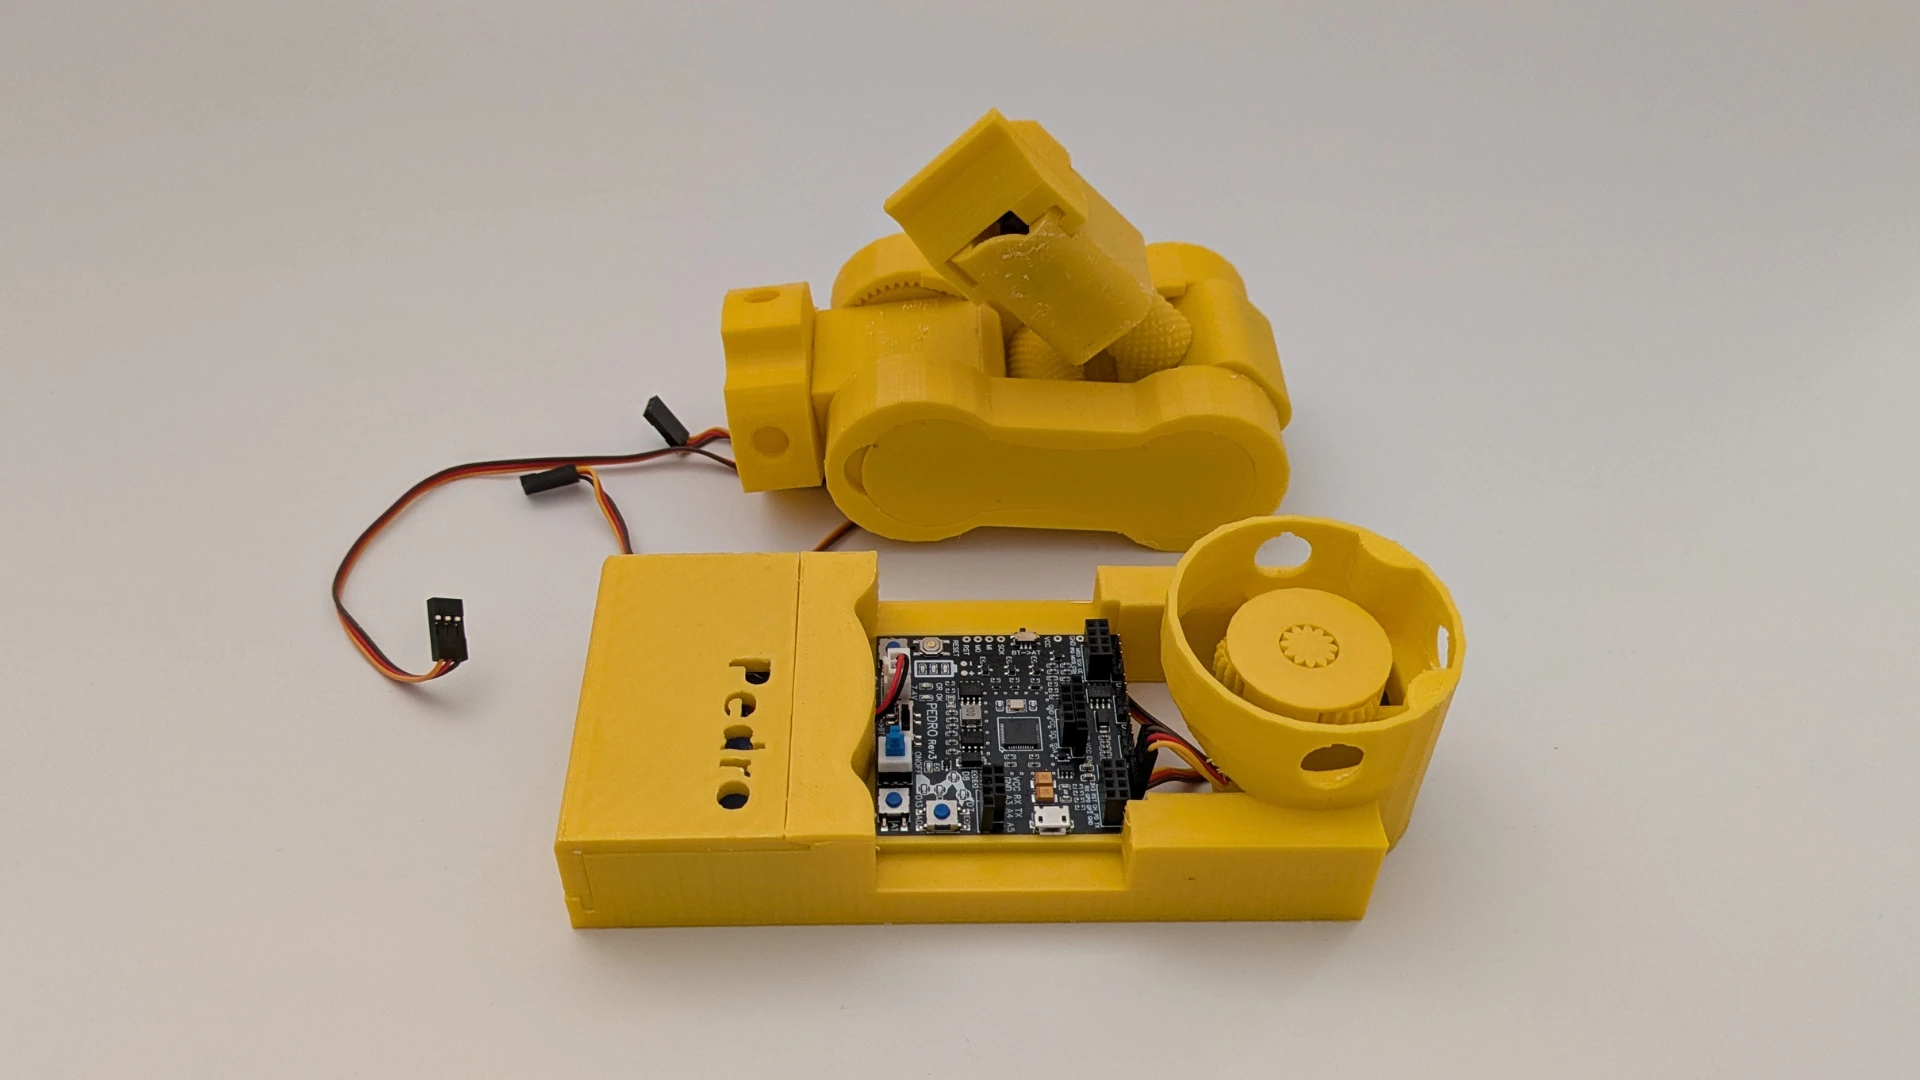
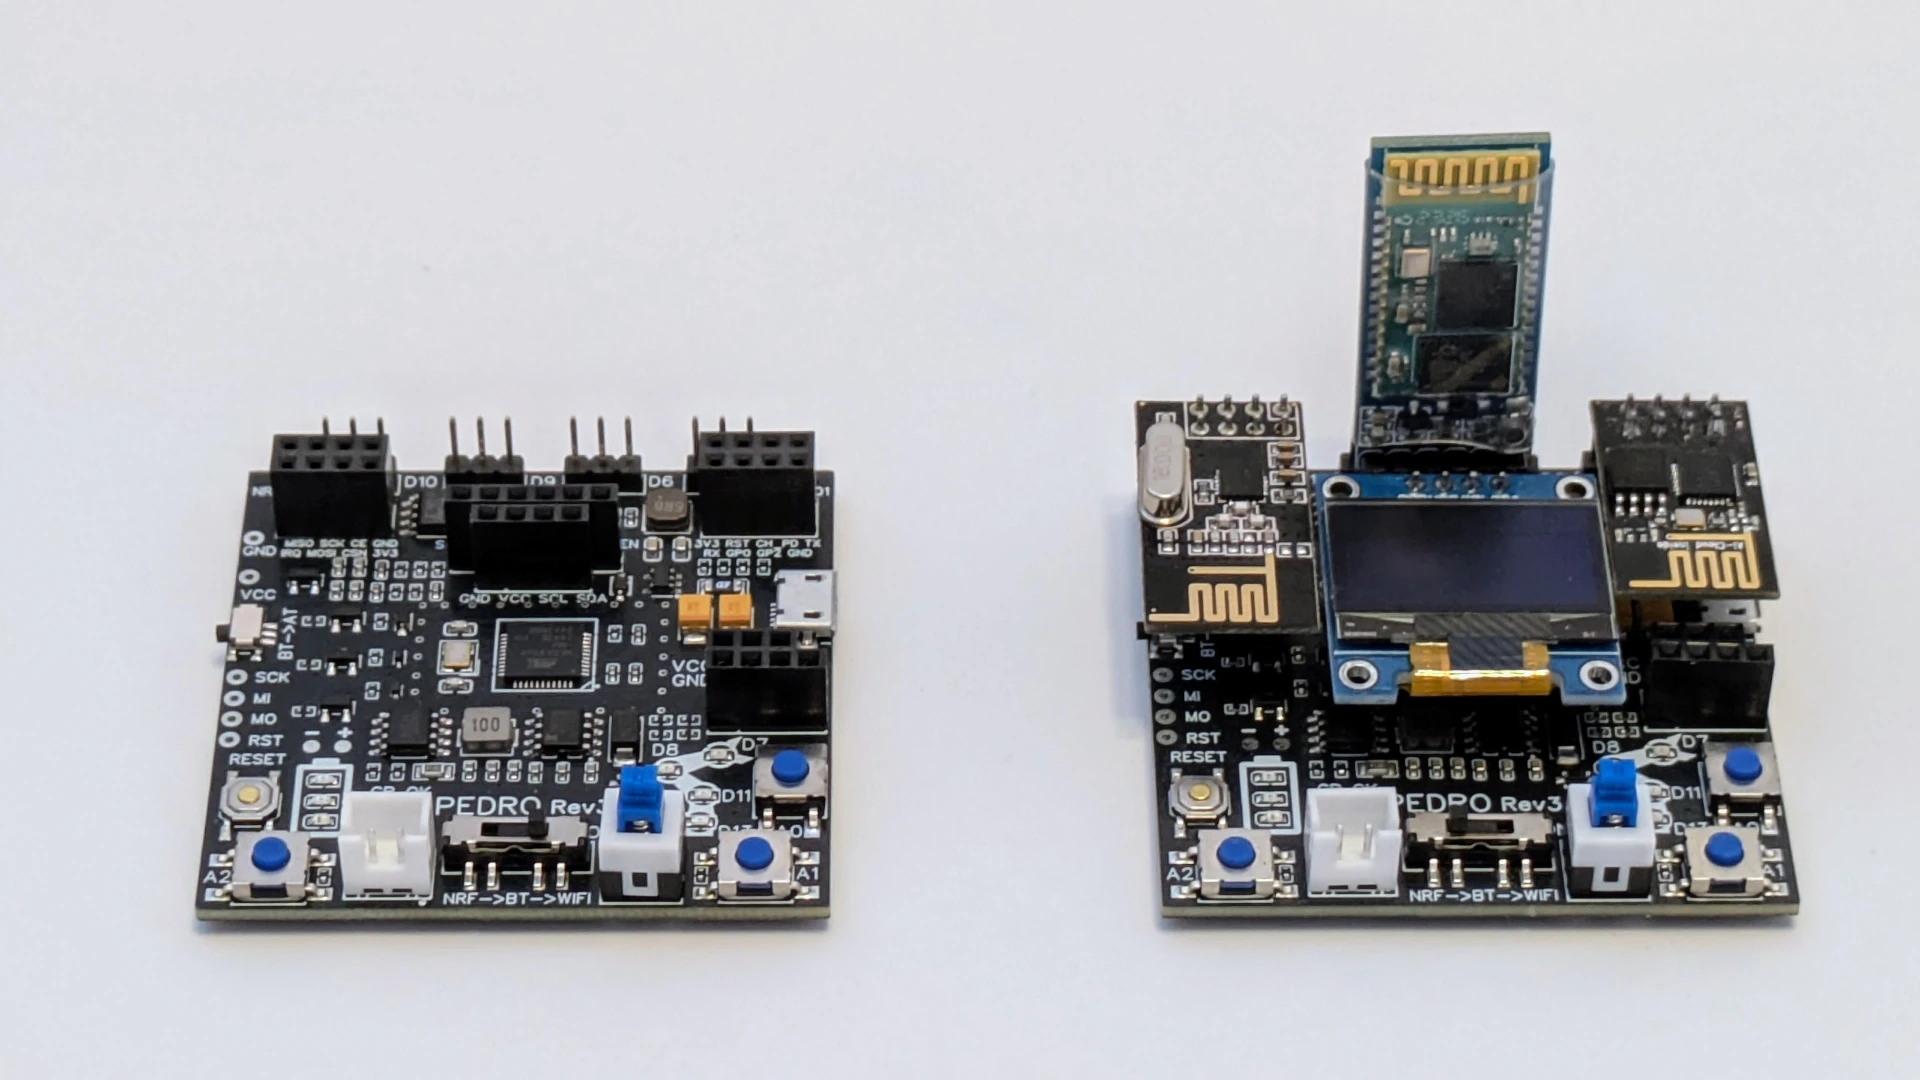
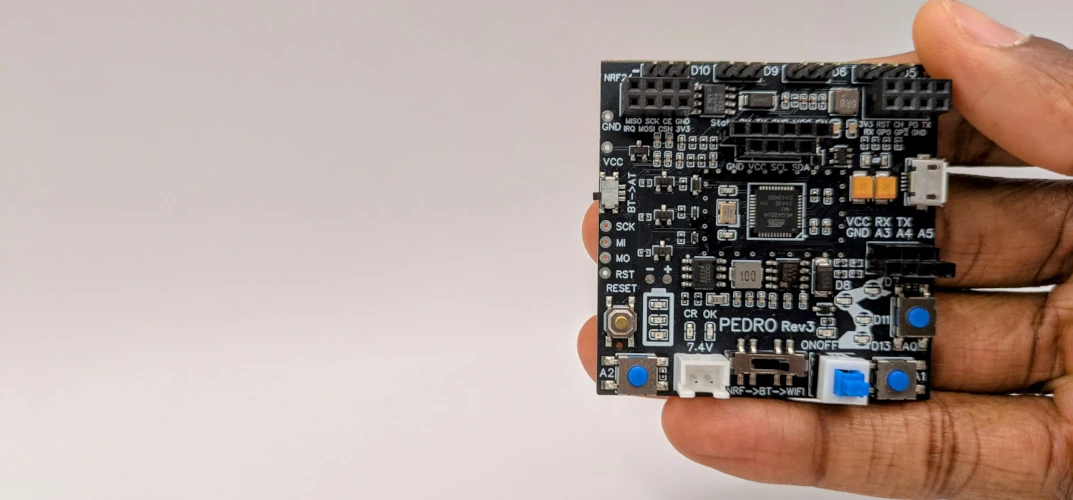
The heart of Pedro is its custom Arduino-compatible control board.
Designed specifically for education, it simplifies wiring and
integration.
Main features:
✅ ATmega32U4 Microcontroller – The same chip used in Arduino Pro Micro.
✅ Micro USB for programming and power.
✅ LiPo Charging Circuit – Charge 7.4V DC battery directly from USB without removing it.
✅ nRF24L01 module for RF control.
✅ HC-05 for Bluetooth connectivity.
✅ ESP8266 support for WiFi.
✅ OLED display 128x64 screen to display data and messages.
✅ Serial RX/TX pins for expansion and debugging.
✅ Serial RX/TX Pins UART - For serial communication and debugging.
✅ 4x Servo Ports Pins.
✅ Plug & Play Design – No soldering or wiring needed, just connect and go!
Pedro supports a variety of control modes to adapt to your learning environment and technical level:
🕹️ Direct Mode
Control Pedro via buttons or analog joysticks connected directly to the board—ideal for learning circuit basics.
📡 Radio Mode (nRF24L01)
Use wireless remotes built with Arduino and nRF24L01 to send commands—great for exploring communication protocols.
📱 Bluetooth Mode
Pair Pedro with a smartphone
using the HC-05 module. Control it via custom apps or terminal commands.
Perfect for mobile robotics!
🔌 USB Serial Mode
Connect Pedro directly to a
computer and use the serial monitor to send commands. Ideal for
debugging and learning serial communication.
🌐 WiFi Mode (ESP8266)
Use Pedro in IoT projects!
Control and monitor the robot remotely through a web interface or local
network. Enables creative STEM applications like data logging or remote
exploration.